Thursday, January 5, 2012

What's up, Gnomies?

How cute are these guys? This is Gnome Sweet Gnome, a brand new set in the Occasions mini catalog. The set also has a baby gnome, plus a wheelbarrow, flowers, watering can, and other gardening goodies.

The paper in the background is actually some leftover from the Holly Berry Bouquet DSP in the 2011 Holiday mini catalog. It may be Christmas paper, but I thought the yellow, reds, and greens worked really well for a garden gnome card.

You light up my lawn!

Supply List
*Stamps: Gnome Sweet Gnome (Occasions mini catalog)
*Cardstock: So Saffron, Real Red, Whisper White
*DSP: Holly Berry Bouquet (retired)
*Ink: Basic Black, various Stampin' Write markers
*Accessories: Modern Label punch, Brights brads, So Saffron 5/8" ribbon (retired)

Something for Everyone

A quick set of cards featuring Packed for Everything from the new Occasions mini catalog. These four stamps can be purchased individually (Packed for Mom, Packed for Dad, Packed for Baby, and Packed for Birthday) or as a group at a 25% savings. I think these are so cute and easy to make a quick set of notecards so you're covered for any event!

Supply List
Stamps: Packed for Everything (Occasions Mini)
Cardstock: Whisper White, Certainly Celery, Bashful Blue, Pretty in Pink, Soft Suede
Ink: Certainly Celery, Bashful Blue, Pretty in Pink, Soft Suede, various markers

Crimpin' - Not just for hair!

Got me a new toy this week - a crimper! So of course I had to do some experimenting!

The crimper is used in two ways on this card. For the background, I folded in the four corners, then ran it through the crimper folded. When I unfolded it, my crimped lines were going in opposite directions. To create the flower, I took a strip of Calypso Coral cardstock and ran it through the crimper multiple times and in multiple directions. This distresses and breaks down the fibers in the cardstock and allows you to separate the cardstock into two strips with a soft texture. I then spiraled the strips up on a punched out circle and added a knot of ribbon in the center with a glue dot. So much fun!

Supply List
Stamps: Always Elegant (page 180 of IBC)
Cardstock: Tempting Turqouise, Calypso Coral, Daffodil Delight, Whisper White
Ink: Tempting Turquoise
Accessories: CRIMPER!, Tempting Turqouise 1/4" grosgrain ribbon, Old Olive 1/4" grosgrain ribbon, large oval punch, scallop oval punch

Wednesday, January 4, 2012

Stamp Club Amour

I spend the first Wednesday evening of each month with my fabulous stamp club. The ladies in my stamp club take turns being hostesses and each month we get together, chat and catch up, ooh and ahh over SU!'s products, and make a card or two.

Here's what we made tonight. A bit early but it could definitely be used as a Valentine's Day card, an anniversary or wedding card, or a simple, unexpected "I love you" card.

To create the shadowed Eiffel Tower, I first stamped it in Crumb Cake, then stamped it again with Early Espresso. So it wasn't too far off, I used a clear mount stamp and lined up the rubber with the very edge of my Crumb Cake image before stamping. Voila!

Supply List
Stamps: Artistic Etchings (page 129 of IBC)
Cardstock: Rose Red, Whisper White
Ink: Rose Red, Crumb Cake, Early Espresso
Accessories: 1/2" Scallop Dots Ribbon in Early Espresso, stamping sponges, dimensionals

Tuesday, January 3, 2012

Fun With Frames (Part 2)

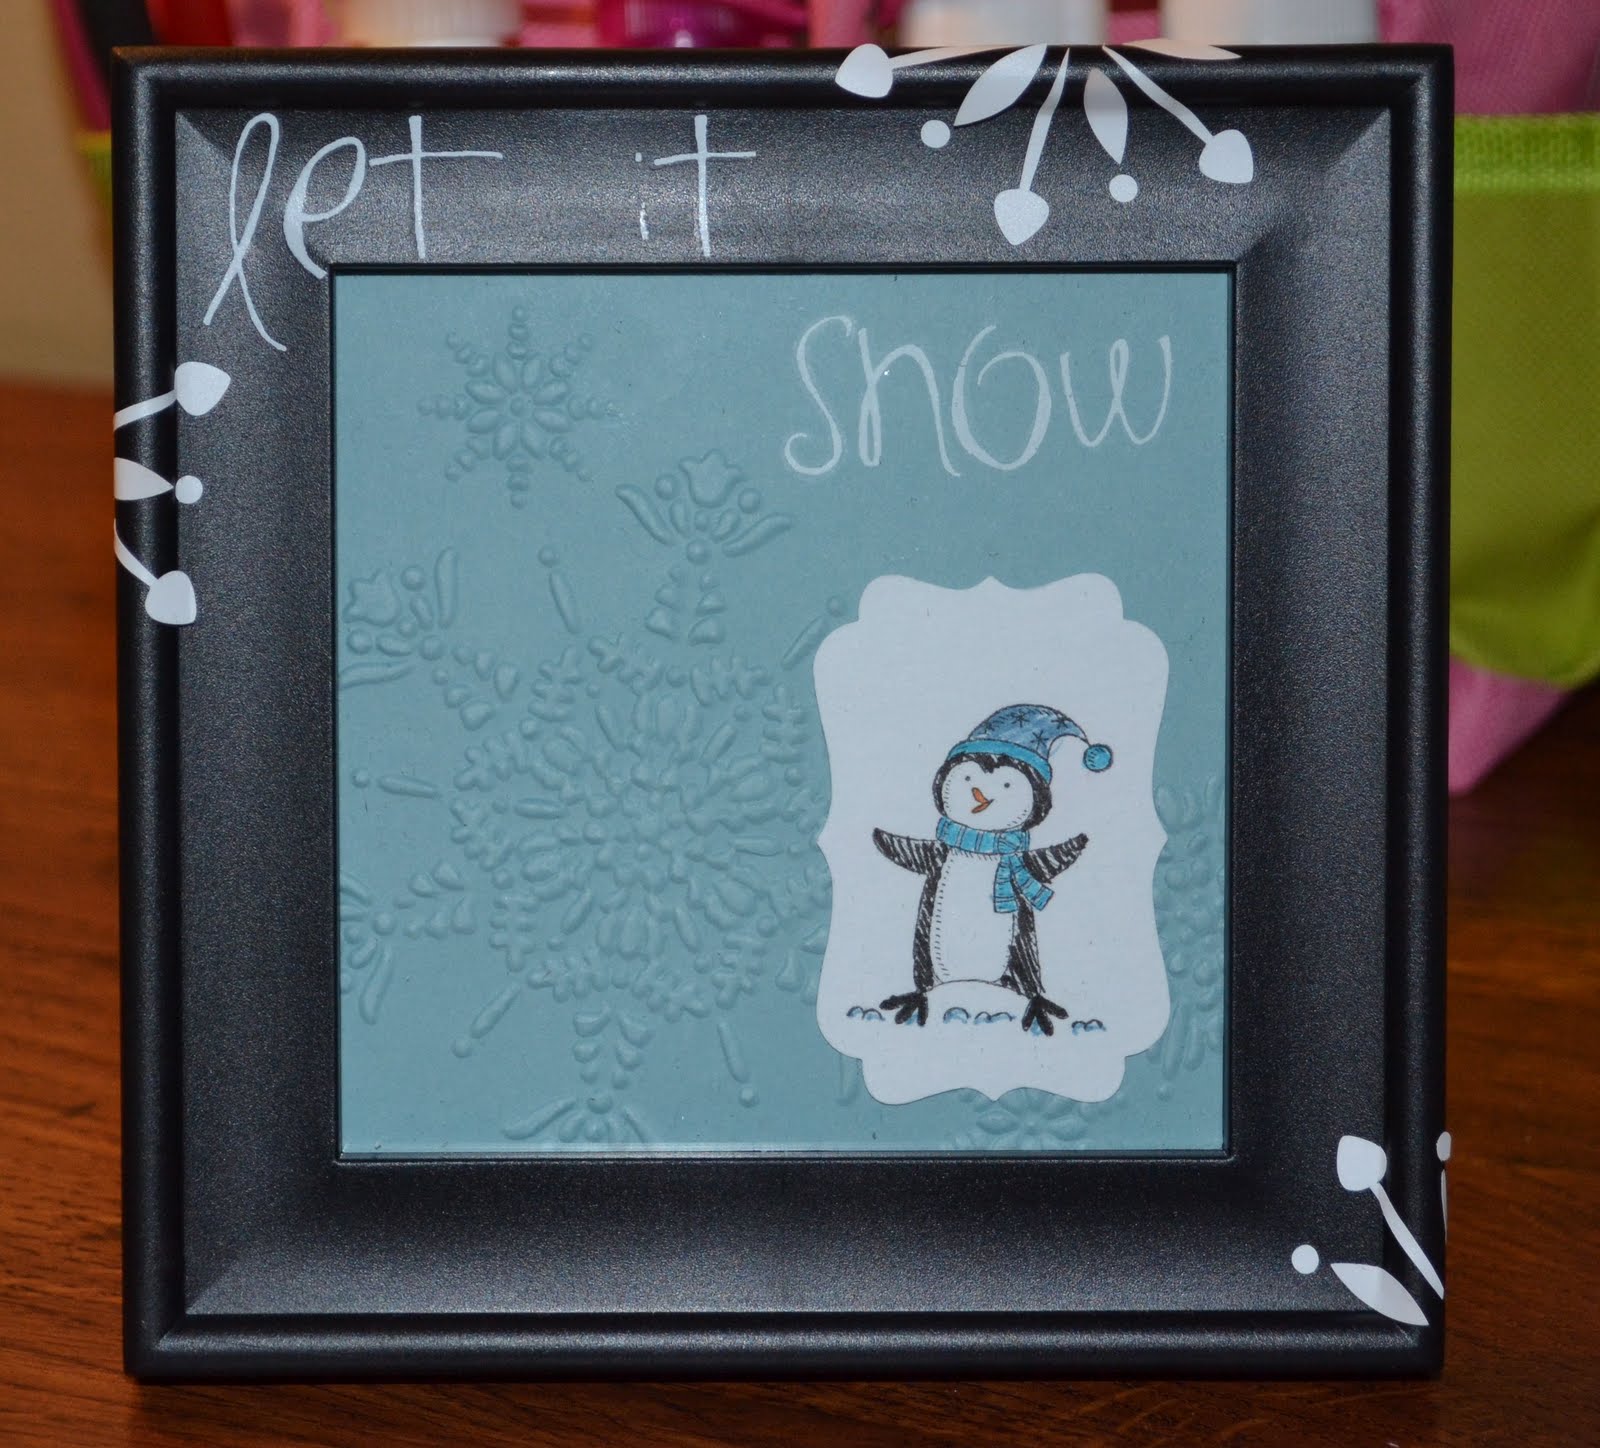
Since the eastern seaboard is frigid and we have a huge 20% chance of snow tonight, here's a snow wish. I wanted to make something where the frame was incorporated into the image. I took one of the 4x4 frames I mentioned in my post yesterday and embossed some snowflakes on a piece of Baja Breeze. I added the "snow" with some old rub-ons I had laying around and stamped a little penguin. I used the same rub-ons to write "let it" on the frame, and took a small snowflake Decor Element, cut it apart, and added it to the frame as well. Decor Elements is SU!'s line of vinyl elements that can be added to walls, mirrors, frames, vases, and any other 3D object you can hold still! Let's see if this helps get me a two-hour delay in the morning!

Supply List
Stamps: Polar Party (page 37 of IBC)
Cardstock: Baja Breeze, Whisper White
Ink: Basic Black classic pad, Tempting Turquoise, Marina Mist, & Basic Black markers
Accessories: Flurry Decor Elements (page 229 of IBC), Northern Flurry Embossing Folder (page 219 of IBC), Decorative Label Punch (page 209 of IBC), frame

Monday, January 2, 2012

Fun With Frames (Part 1)

As the title implies, there is a part 2 coming too! I got one of those really cheap assorted packs of frames because I needed some 8x10 and 5x7 frames for family photos. I wound up with some extra 4x4 and 4x6 frames so I decided to do a little experimenting.

For this design, I thought back to a project I did in 8th grade art class using tissue paper and Mod Podge. To start off, I stamped the images from the Artistic Etchings stamp set in black on some white tissue paper. Then I tore them out. I also tore some blue and green tissue paper I had left over from the holidays. The wrinklier, the better! Once I had all my pieces, I disassembled the frame, and put a coat of Mod Podge right on the inside of the glass. I put the stamped pieces down first, then put more Mod Podge over them, then continued building up layers of tissue paper and Mod Podge. Once everything was dry, I trimmed off the excess tissue paper from around the edge of the glass and reassembled my frame. I wouldn't recommend doing this with a fancy expensive frame, but with one I paid less than a dollar for, I think it came out pretty well!

Supply List
Stamps: Artistic Etchings (page 129 of IBC)
Cardstock: Whisper White (I put it behind the tissue paper to cover up the cardboard backing board)
Ink: Basic Black
Accessories: Tissue paper scraps, Mod Podge, foam brush, picture frame

Sunday, January 1, 2012

A Fresh Beginning

Today's project features some fresh blooms for a fresh year. These are 4-1/4" square cards. One thing my SU! upline taught me is if you're going to make a card, you may as well make two since you'll have everything out and you usually need to cut the paper in half anyway! :-)

For the bottom layer, I stamped the design from Always Elegant in Wild Wasabi, then flipped the paper over and scored it in 1" increments using my scoring board. On the lower card, I sponged some Soft Suede ink over the scored lines to increase the distressed aged look, but I kept the lines on the top card plain. Click on the picture to view a larger image and see the scored lines.

It's always good to have quick note cards on hand - you never know when you may need them!

**IBC refers to SU!'s Idea Book & Catalog**

Supply List
Stamps: Always Elegant (IBC page 80), Pocket Silhouettes (IBC page 109)
Cardstock: Soft Suede, Wild Wasabi, Very Vanilla
Inks: Soft Suede, Wild Wasabi
Accessories: Simply Scored, Hodepodge Hardware (retired), Linen Thread, Stamping Sponges